Organisations
Introduction
Milo holds information about all different types of organisations e.g.:
- Voluntary Organisations
- Statutory Organisations
- Private Companies
- Partnership/Networks
- Educational establishments
These are managed using the Organisations object in Milo.
For an Organisation, Milo provides a wide range of fields in which data can be recorded. It also allows contacts to be linked to an organisation, holding details of the role and the location at which they work.
Where an organisation has a number of offices, shops, outreach offices etc., you should create a new record for each office and associate them to the parent office as a branch.
Organisation records are the heart of the system. Most other parts of the system interact with organisations in some way, including Contacts, Volunteering Opportunities, Interactions and Memberships.
Managing Organisations in Milo
Navigate to Organisations - Home
Click on the Organisations tab at the top of the screen to go to the Organisations home page. By default, you will see a list of recent organisations you have accessed. By clicking on the 'View' dropdown above the list of recent organisations, you can select ‘All Organisations’, which will provide an alphabetised list of every organisation on the system.
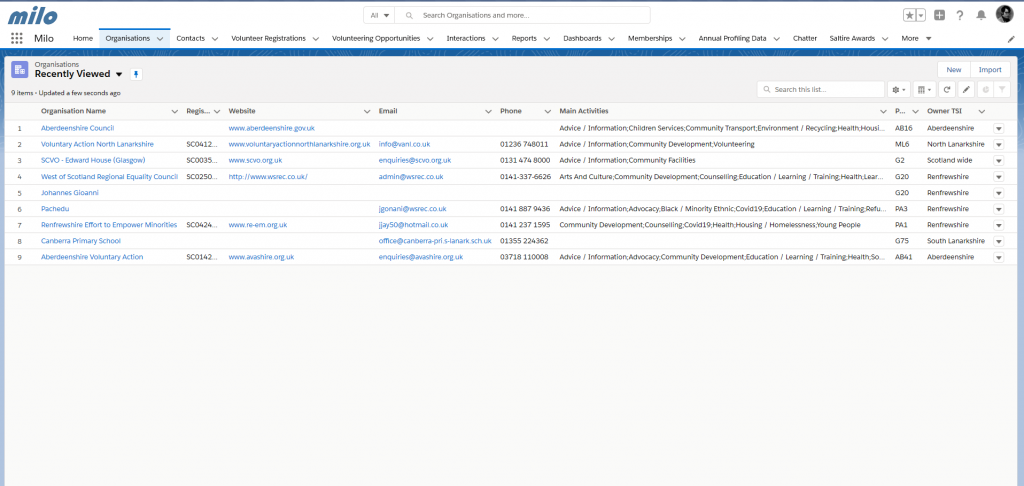
There should also be a View specific to your local TSI, e.g. Edinburgh.
When you create your own views, these will also be visible on this dropdown. See the Getting Started module for creating new Views.
You can search for any record on the database using the Global Search box at the top of every screen.
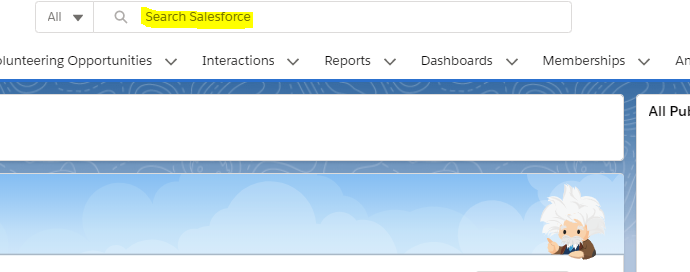
To search for an organisation, simply type the name or part of the name into the search box. Try typing ‘Pet Fostering’. You will now see any contacts, interactions, organisations, volunteer opportunities or volunteer registrations associated with the search phrase. Now try typing SC0... and any number, and you will start to see organisations with a charity number that fits what you've typed.
Alternatively, you can use views (see module 01) to set up a specific filter for organisations, e.g. 'All organisations in my TSI area', 'All organisations which are social enterprises', 'All organisations within G12'. The 'My Organisations' view will return all records you have personally created.
Whichever method you use will return a list of organisations. Click on any of the organisation names to access the record.
When you click into an organisation record, you will see the organisation view screen. As in the old system, data in each record is organised into a number of sections. Scroll down to see the data held on an organisation, broken down into:
- Organisation details
- Basic Profiling Data
- Neighbouthoods Served
- Aims & Objectives
- Policies and Quality Standards
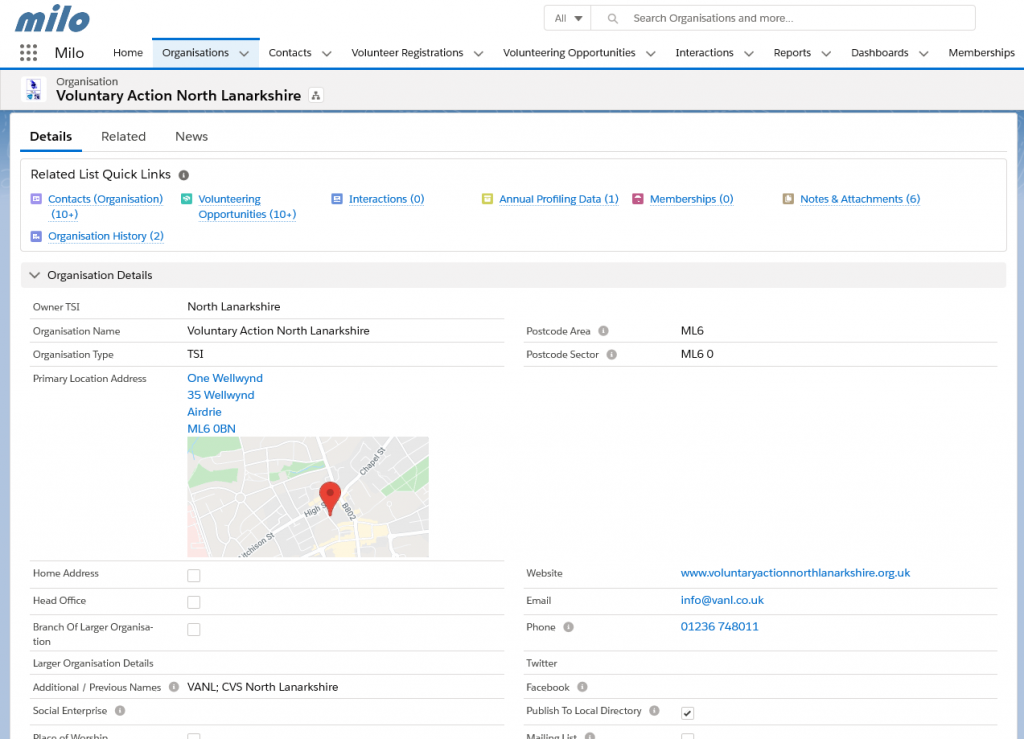
Related records are displayed at the top of the screen as Quick Links. You can see at a glance if there are any Contacts, Volunteering Opportunities, Interactions or Membership records associated with the organisation record.
You can also see these related objects listed under the Related tab, next to Details at the top of the organisation record.
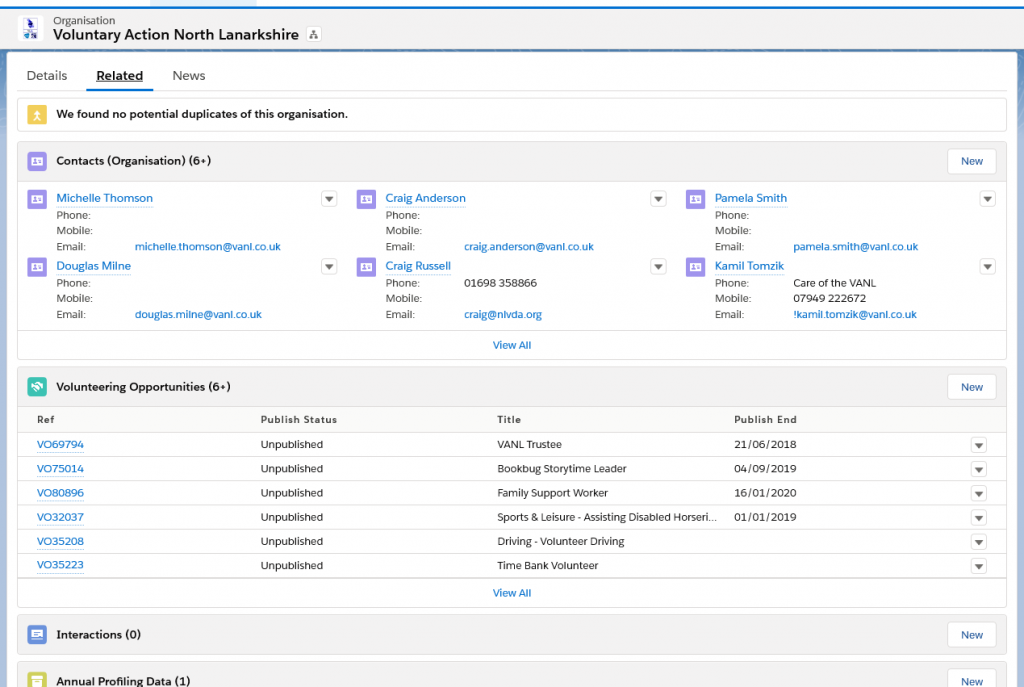
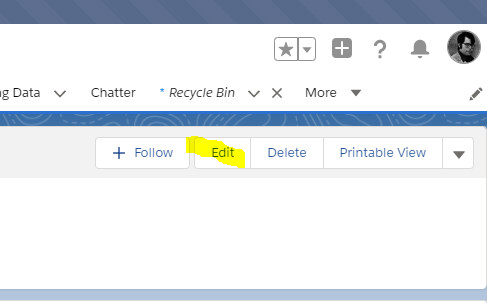
To make changes to an Organisation (or any other object), click on the Edit button at the top of the screen.
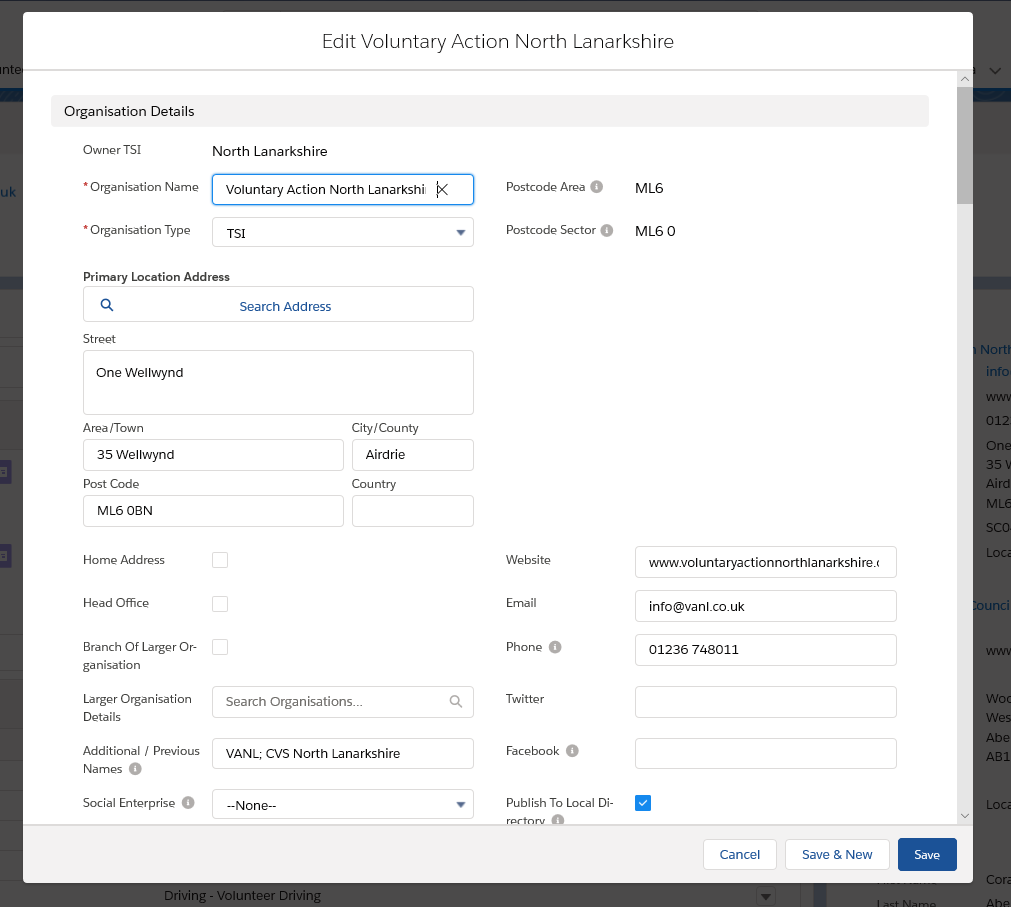
The page will open in edit view, allowing you to update and change any data on the organisation, if you have permission to do so.
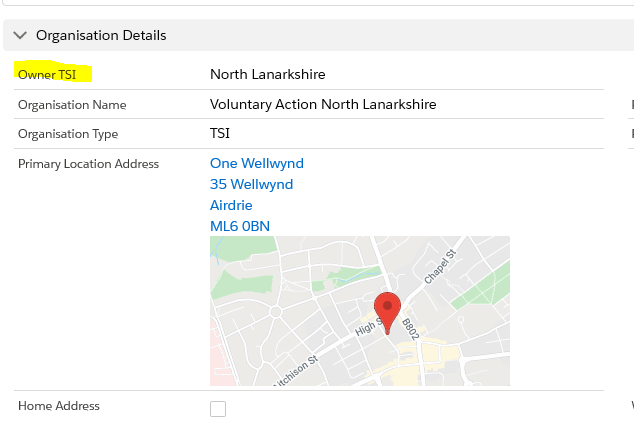
You should be able to edit any record owned by your TSI. You can see which TSI owns any given record by looking for the TSI Owner field, usually at the top of the screen:
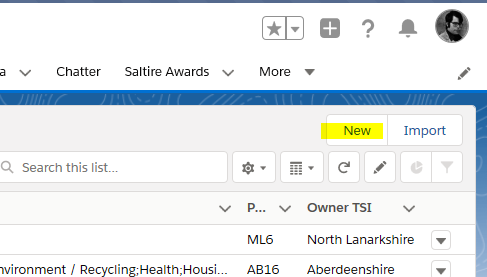
To create a new record, use the New button on the top right of the page.
A New Organisation input page will appear. This looks the same as the edit screen, but is blank to allow you to input a new organisation.
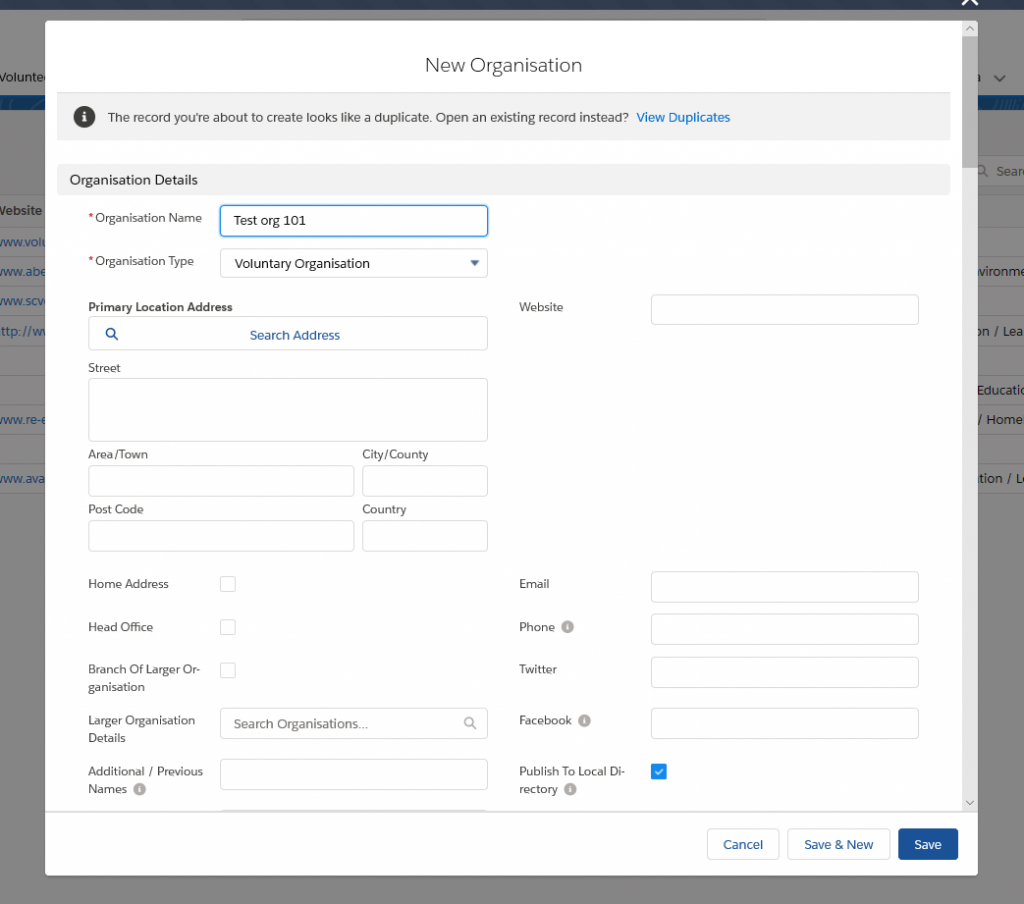
Note that at the top of this screen, it's telling me the organisation I'm inputting looks like it may be a duplicate. This is a very useful feature! If you see this message, it's worth stopping and checking you're not about to input a duplicate of an existing organisation.
Some fields are mandatory. These are signified by a red asterisk next to the mandatory fields. You cannot save until all of these fields have been completed. In an organisation record, the mandatory fields are: Organisation Name, Organisation Type, Legal Status, Geographical Reach.
Once you have added the mandatory fields plus any other information, click Save.
You will then see the view organisation screen as before:
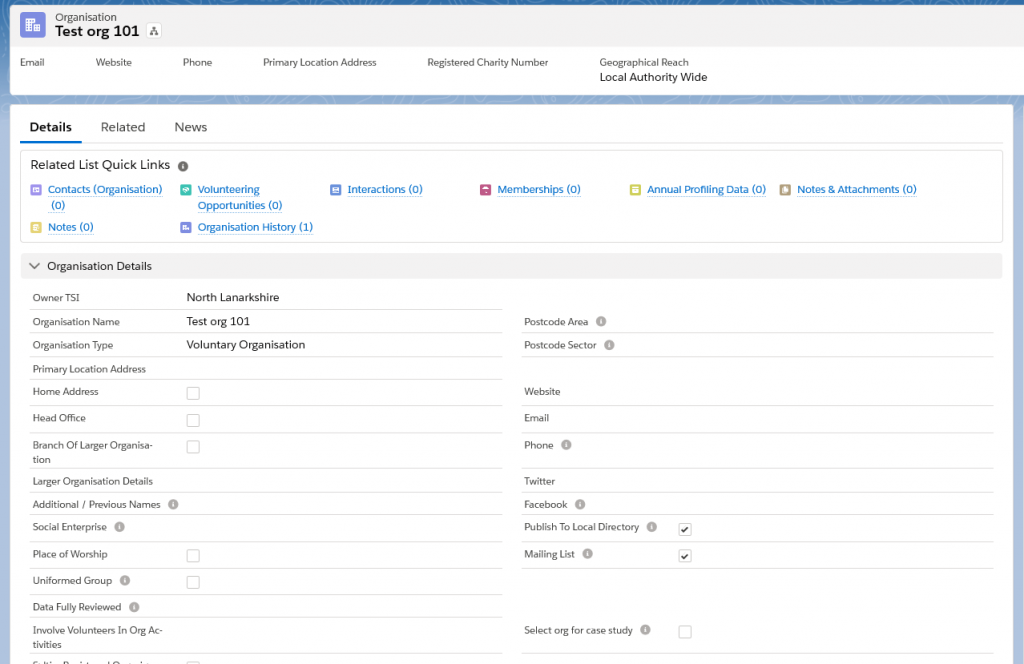
Adding Contacts, Volunteering Opportunities etc. to an Organisation
You can now begin associating Contacts and other related objects to your new organisation.
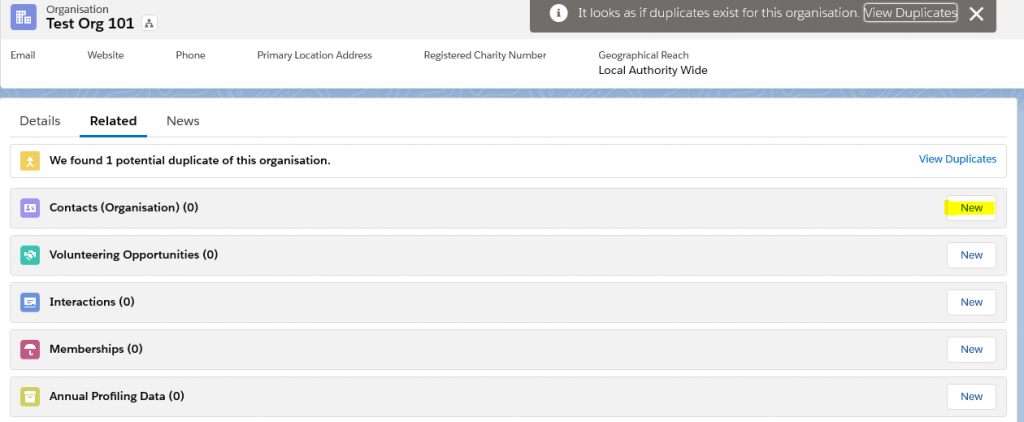
To add a new Contact click on the Related tab again and then click on the New button in the Contacts (Organisation) section.
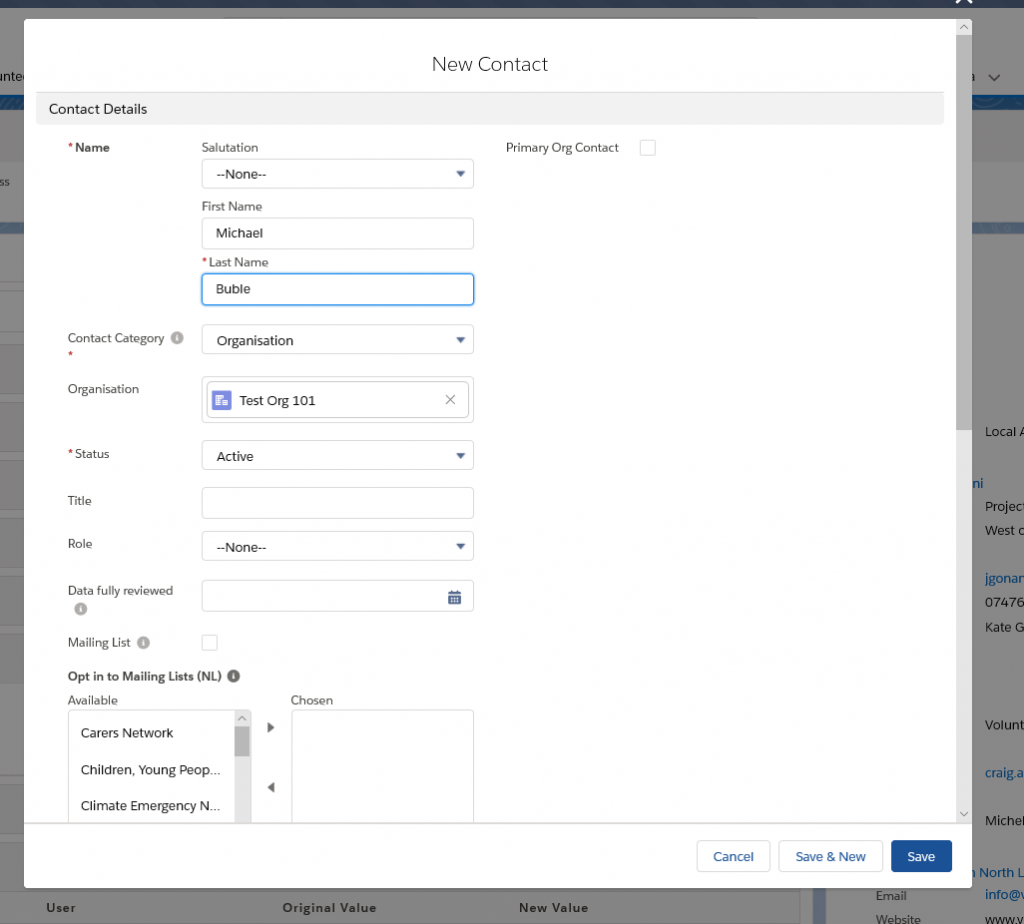
A new edit window opens up displaying the fields available for adding a new contact to an organisation record. Again, mandatory fields have a red asterisk. Complete the details of the contact (you will want a name and email as minimum, but as much detail as you have), and click save.
You will now see the view contact screen for the contact you have just created.
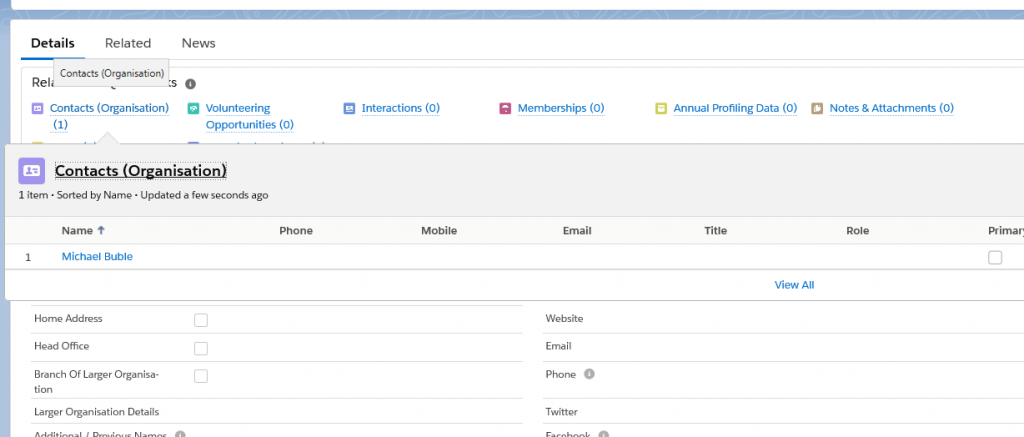
Now look at the at the top of the test Organisation record – you will see it now says (1) after Contacts (Organisation) rather than (0), because you have now added a contact. Hover over to see a summary of the name, email etc. of the new contact.
To add a new volunteering opportunity, it's the same process: go to Related, click the New button next to Volunteering Opportunities, and add the details of the opportunity.
Summary
In the Organisations module, we have covered:
- Navigating to the Organisations home screen
- Searching for an organisation
- View/edit organisation records
- Create a new organisation
- Adding Contacts, Volunteering Opportunities, etc related to an Organisation .
These skills are transferrable across the other Milo objects (Volunteer Opportunities, Volunteer Registrations etc.). You can use the same techniques to navigate around Milo and start to explore the other features Milo has to offer.
Remember – for more step by step advice, see the individual training modules. If you have any problems or get stuck, you can contact the Milo team at milosupport@scvo.scot

